Print & Stitch
|
This tutorial explains how to process the Print &
Stitch design in Embird. Print & Stitch technology works in the following way: An image can be selected as a background to an embroidery design. This image can be resized and printed out (as a mirror image) onto Iron-On transfer paper. This is then ironed onto a piece of material, cut out and then hooped for embroidery. A coordinating design is then stitched on top. Note: You can download several free Print & Stitch samples from http://www.vikingemnet.com, they are in Downloads -> Sample Galleries -> Print section. |
|
1 - Run Embird and click on "Editor" menu. |
Picture No. 1

|
4 - Use "File -> Merge" command to merge a design or even several designs belonging to the image. (Picture No. 2). Do not use Open command, as this will erase the image. |
Picture No. 2

| 5 - While merging a design, Embird will ask you about its position. (Picture No. 3). This is used for designs that have been previously prepared for the Print & Stitch technology. This is further explained in step 8 below. For now, click on Cancel button when asking about position. |
Picture No. 3

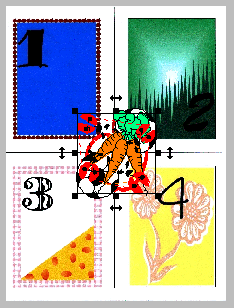
| 6 - When you have merged all parts, you can position them over image,
because their position is probably not correct (Picture No. 4).
Sometimes it is necessary to split some designs, because each part must fit into: - 100 x 100 mm hoop for .PES, .PEC & .HUS, - 125 x 90 mm hoop for .SEW, - 140 x 200 mm hoop for .JEF, - 120 x 115 mm for .PCS & .PCM, - 130 x 240 mm for .XXX. Read Interactive Freehand Splitting tutorial to find out how to split a design. |
Picture No. 4

| 7 - All parts are on the correct position now (Picture No. 5). We have also verified that their sizes do not exceed the size of hoop, as specified in step 5. |
Picture No. 5

| 8 - Click on "File -> Save As" menu to save
the parts to hard disk. Embird will display a dialog box, allowing you
to specify the format and file name. Then it will save each part to hard
disk. It will automatically generate file name for every part being
saved, e.g. if you choose "babybook.hus" as file name, Embird
will save part 1 as "babybook_1.hus", part 2 as
"babybook_2.hus", etc. While saving designs, Embird will put a small black dot on the image, showing the hoop centering for each part being saved.
This will simplify the process of embroidering, because you will be able to hoop the fabric and position the needle precisely. When the saving is finished, a table with positions is displayed. You can print this table and use it later when re-opening designs in Embird - see step
5.
9 - Click on "Image -> Save" command to saved modified background image. While saving background image, Embird will ask you about the saving of a special file with the .BMQ extension. This file contains positions of stored designs. It can be very useful when re-opening parts saved in step 8. If you allow Embird to create the .BMQ file, the position box shown in step 5 will be automatically filled with correct data. 10 - Print mirror image of background. Click on " Image -> Print Preview" command first to check image before printing. Embird will ask you whether you want to print the mirror image or normal image. Run " Image ->Print" command if you are satisfied with preview. |